Monday, September 19, 2022

HP Spectre Convertable Laptop - restarts instead of shutdown

Had an old laptop to repurpse.  Reinstalled windows, drivers, etc.  Seemed to work fine except when I would shutdown the computer a minute later it would be sitting there on again.  Argh.

Looking online for the HP Spectre x360 convertible models this seems to be a common issue.  Found solutions with downgrading drivers (which does appear to work), etc.  

Then luckily I found this answer by DJElectron: SOLVED!!! Re: HP Spectre X360 15 2017 model does not shut do... - Page 2 - HP Support Community - 5978451

So, resetting the CMOS by doing the following fixed the issue.

  1. Shutdown the system by holding the power button
  2. Press and hold Win+V
  3. Power On System
  4. Once light on power button comes on wait 10 seconds then release Win+V
  5. Screen should say CMOS checksum invalid after a few moments. 
  6. Press Enter to reboot
Highly frustrating issue with an easy fix :)


Thursday, September 15, 2022

SQL to PowerApps without Premium Connector

Issue

We have an application (our primary one) that the licensing structure is based on active device connections.  Problem, we have more devices than licenses.  This isn't a big deal since due to scheduling not all devices are connecting at once.

But, when user 1 on device 1 goes home and forgets to close the app then user 2 on device 2 has an issue (provided the other licenses are already taken).  Closing out User 1 is fairly easy (reboot the computer), but not when there are 10+ workstations and they don't know which ones using the license.  It suddenly because a whack-a-mole game that they didn't want to play.

Idea

The license usage information is stored in a SQL table.  So if we can make this information accessible they can see exactly where licenses are used. 

Note: there are other ways to handle this, but they each had their own cons (ie auto logout of users on timer, etc).  For now, simply reporting on it was the best option to make the whack-a-mole game quicker.

With PowerApps we could access the SQL table directly and tell the users!  But wait, MS charges (IMO) a large amount of money for these types of connections.  Can we do it without a premium connection?  Yes, not as great, but it will do :)

Solution

The idea is to take this in multiple parts to end up with an end product that we put on the main SharePoint page so they can quickly see what workstations are up for whacking.

  1. Export the data from SQL
  2. Upload it to a SharePoint List
  3. Display it in a pretty format


1. Export from SQL 

First up we need to get the data out of SQL into a format we can use.  Also, we want to do this easily, I'm not interested in messing around all day with figuring out why I can't get the export to Excel to work or other variations.  PowerShell has a SQL Module and there's Export-CSV, so that's easy.

We'll need the SQL PowerShell module: Download SQL Server PowerShell Module - SQL Server | Microsoft Docs.  In my case I already had it as I added it when I built the server and installed SQL.

Devart.com had a blog on this with a number of options and well written.  Option 3 is what we are looking for How To Export SQL Server Data From Table To a CSV File (devart.com)

Invoke-Sqlcmd -query 'Select WSID, ConnDate FROM mydb.myschema.connections;' -ServerInstance S-SQLDEV | Export-Csv -Path D:\Reports\connections.csv -NoTypeInformation

Great, now I have a PowerShell script that I can schedule with Task Scheduler to run every so often, let's say 10 minutes, and dump a csv file for me.  It's pretty lightweight so I'm not worried about the hit my SQL server will take from it.

Task Scheduler: 

Under Program/Script enter Powershell.exe

For the "Add arguments" enter -ExecutionPolicy Bypass "D:\Scripts\MyScript.ps1" (of course using your path and script name)

And the account that runs the Scheduled task needs read permissions to the SQL Database in question (or you will get blank results).


2. Upload to SharePoint List

Okay, now we need to get our lovely csv to a SharePoint list.  This is fairly easy, but there are some steps involved.  In particular, we need PowerShell v7 and PnP PowerShell Module (at least I went this route).  Also, I did this part on a different server as I didn't want to monkey around with uploading files to SharePoint on my SQL server.  Instead, I used another PS script to move the file from the SQL server to my file server and then uploaded from there (optional step below).

Optional: as just stated, I didn't want this part on my SQL Server so I copied the file to a File Server first. I did this by added the below to my PS script on the SQL Server.  (the service account used to run the scheduled task will need permissions at the remote location)

Copy-Item -Path "Microsoft.PowerShell.Core\FileSystem::D:\Reports\connections.csv" -Destination "Microsoft.PowerShell.Core\FileSystem::\\FileServerName\D$\Scripts\Connections\connections.csv"

I then proceeded with the rest of the steps on the File Server.

Installing PowerShell v7 is pretty easy... Installing PowerShell on Windows - PowerShell | Microsoft Docs

Optional: PSv7 doesn't include the ISE anymore.  

Now they encourage you to use Visual Studio Code with the PowerShell Extension.  Download Visual Studio Code - Mac, Linux, Windows

So I proceeded to download VSCode on my workstation so I can build the PSv7 script and run it on the File Server.  (installed PSv7 on my workstation and the file server)

Once installed either install the PowerShell extension during the setup process or go to Settings (bottom left), Extensions and find / install.

SharePoint PnP PowerShell Module:

I decided to use the PS PnP Modules as I felt that it greatly reduced complexity of the scripts.

Here's a great writeup of SharePoint PnP by June with connections instructions: How to Use SharePoint PNP PowerShell Module in Office 365 (adamtheautomator.com)

Note: you'll want to run Install-Module "PnP.PowerShell" when logged in as the account that task scheduler will be set to run as or the script will fail.

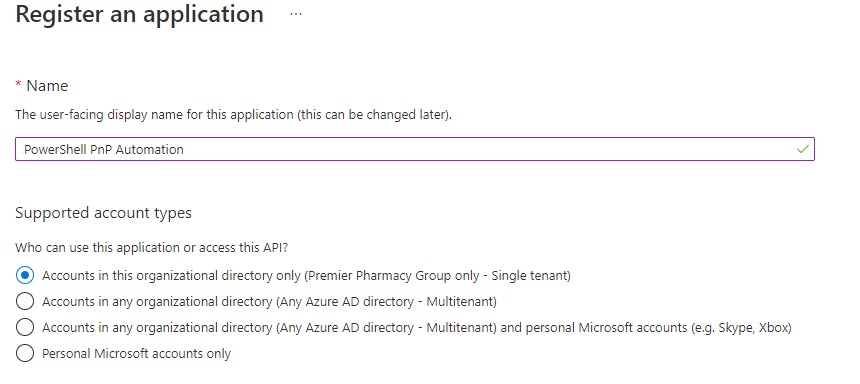
I had issues using his directions for non-interactive connections.  So, I used the following instead which I created a separate post for: Did You Restart?: PowerShell PnP connection using Azure AD App Registration and Certificates (didyourestartyet.com)

Import CSV to SharePoint List:

Now we can import our csv to a SharePoint List to use as our "free database".  Salaudeen nails it with his post on SharePoint Diary.  SharePoint Online: Import CSV File into SharePoint List using PowerShell - SharePoint Diary

SharePoint List: 

First let's setup a List on our SharePoint site.  I'm not going to detail these steps as you should be fairly familiar with this already.  I will point out however that SharePoint forces creation of column "Title" with the required flag on.  Rather than renaming this column I just went into the list settings, selected the column, and turned off the required flag.  Then I leave the Title column blank and ignore it.  

I also created the necessary columns in the SharePoint list to match the columns in the CSV.  So in my case WSID and ConnDate.

PowerShell: 

I used the second option from the SharePoint Diary with PnP and some slight modifications.

  1. We need to initiate the non-interactive connection to SharePoint online
  2. I wanted to replace the list each time, not add or update.

Script is copied from the SharePoint Diary site linked above.  I only added the connection and the line to get/delete all list contents.

#Parameters

$SiteUrl = "https://contoso.sharepoint.com/sites/mysite"

$ListName = "Connections"

$CSVPath = "C:\Scripts\Connections\Connections.csv"

#Connect to SharePoint Online non-interactive

Connect-PnPOnline $SiteUrl -ClientId 'yourclientIDfromPowerShellStep' -Tenant 'contoso.onmicrosoft.com' -Thumbprint 'CertificateThumbprintfromPowerShellStep'

#Get the CSV file contents

$CSVData = Import-CsV -Path $CSVPath

#Get all contents of the list and delete it!  No add or update

Get-PnPListItem -List $ListName | Remove-PnPListItem -Force

#Iterate through each Row in the CSV and import data to SharePoint Online List

ForEach ($Row in $CSVData)

{

    Write-Host "Adding Contact $($Row.WSID)"

     #Add List Items - Map with Internal Names of the Fields!

    Add-PnPListItem -List $ListName -Values @{"WSID" = $($Row.WSID);

                            "ConnDate" = $($Row.ConnDate);

                            };

}

#Read more: https://www.sharepointdiary.com/2015/09/import-csv-file-to-sharepoint-list-using-powershell.html#ixzz7etuTjTh8


Awesome script.  Great job Salaudeen.

Now all I had to do was save the script and make a scheduled task that runs as the user that I setup the Powershell PnP automation certificate under. Note: must also install-module "PnP.PowerShell" under that account.

Now, the csv is uploading to the List file and overwriting all contents at the schedule I set (really, we're deleting all content and then uploading the csv...)


Since the data is now in a SharePoint List we can access it with PowerApps / PowerAutomate without paying for the premium connector.  No, it's not real-time, but that hardly matters for some data.

PowerShell PnP connection using Azure AD App Registration and Certificates

I had a project I was working on where I wanted to automate uploading of a CSV file to SharePoint List.  Of course with all the security changes and MFA I needed to find a way to do it securely. 

That's when I found the following by June: How to Use SharePoint PNP PowerShell Module in Office 365 (adamtheautomator.com)

Using his directions for the Non-Interactive didn't work for me... but it got me on the right track.  Know that his directions may work fine and I just didn't do it right :)

I used the following to make this work:

  • PowerShell v7
  • Visual Studio Code (as replacement for ISE)
  • Windows Server 2016 and 2019, also replicated on Windows 10 and 11.

The following steps will be covered:
  1. Create and import SSL Cert
  2. Register App in Azure AD
  3. Set app permissions
  4. Set app certificate
  5. Connection string for script
Hopefully this will help me when I need to do it again in the future or anyone else that happens to read these notes!

Note: don't forget to run Install-Module "PnP.PowerShell"  

Create the Self-Signed Certificate:

Create the self signed certificate. Other options can be used, these are the basics.

New-SelfSignedCertificate -Subject "PowerShell PnP" -CertStoreLocation Cert:\CurrentUser\My

This is going to generate a certificate thumbprint.  Copy it into the next part.

Export the certificate as a CER and PFX

Export-Certificate -Cert Cert:\CurrentUser\My\PasteThumbprintHere -Type Cert -FilePath PowerShellPnPM365App.cer

$password = ConvertTo-SecureString -String "UberSecurePasswordHere" -Force -AsPlainText

Export-PfxCertificate -Password $password -Cert Cert:\CurrentUser\My\PasteThumbprintHere -FilePath PowerShellPnPHost.pfx

You now have a CER and PFX file.  The CER will be uploaded to Azure AD.  The PFX will be installed on the computer doing the automated scripting under the personal certificate store of the user account used for the automation.

Go ahead and login as the account that will be running the scripts.  Then install the PFX certificate with the password you chose.

Copy the thumbprint as you'll use that in your script.

Setup Azure AD:

Jump over to your Azure AD admin center and navigate to "Azure Active Directory" and then "App Registrations" then "All applications"

Click New Registration and give it a name.  No Redirect URI is needed.

This is going to give you a screen showing your new Application (client) ID and the Directory (tenant) ID.  Copy these both down as you'll need them later.


Click on Certificates and Secrets, and then click Certificates

Click upload certificate and select the CER that you created earlier.  Notice the thumbprint should match what you had earlier.


Now you can give your app permissions to the area you need.  In my case I chose to use API Permissions.  Click API Permissions, and then Add a Permission.  Choose the area you want to add, in my case it was for a SharePoint list so I picked SharePoint.

I then wanted it to be application permissions as this was for automation.

Here you can choose to give access to Full Site control, or you can narrow it down further.  I wanted to be somewhat granular in this case so I chose "Sites.Selected".


We now show the Sites.Selected, but notice the "Not Granted".  I then click the "Grant admin consent for ...." to grant permission.

The checkmark went green and permission now showed granted.

We also need to give permission to the specific site!  If you click on the permission you'll see the following: Allow the application to access a subset of site collections without a signed in user. The specific site collections and the permissions granted will be configured in SharePoint Online.

Let's hop back over to a PowerShell 7 window that has the PnP Module installed.

Connect-PnPOnline -Url "https:contoso.sharepoint.com/sites/mysite" -PnPManagementShell

You should be given a code to copy, and a link to a web browser login page.  Open it and login with Global admin to give consent.

Grant-PnPAzureAdAppSitePermission -AppID "Application(Client)ID Here" -DisplayName 'PowerShell PnP Automation' -Site "https://contoso.sharepoint.com/sites/mysite" -permissions Write

You can double check using

Get-PnPAzureADappSitePermission


Now we can test that all works for our script!


$SiteUrl = "https://contoso.sharepoint.com/sites/yoursite"

Connect-PnPOnline $SiteUrl -ClientId 'YourClientID" -Tenant 'contoso.onmicrosoft.com' -Thumbprint 'YourCertificatesThumbprint'

It should connect with no errors if all is happy.
Then we can test with pulling a list of all the SharePoint Lists on that site...
Get-PnPList

You should see your sites Lists.

Happy Automating!


Friday, July 1, 2022

Sage 300 ERP - ODBC error - Invalid Database Specification

We utilize Sage 300 ERP from a Windows RDSH environment.  After upgrading to a 2019 environment and reinstalling Sage I had manually created the ODBC DSN.  Unfortunately this caused errors for end users "Invalid Database Specification".  
You'll find a lot of info that this is of course due to ODBC connection issues, and I kept finding that it referenced that the end users didn't have permission to access the SYSTEM DSN.
Fixes include making registry changes, using User DSN, ensuring you're using ODBCAD32, firewall issues, etc.

None of these worked for me until I found a quick mention on a Sage user forum thread stating to "Run As Administrator" Sage 300 so it could create the ODBC connection itself.

After I cleaned up the changes I had tried and deleted the ODBC I had manually created I did this and low and behold, that created the DSN and it works for end users.  (see very last post)

I despise Sage 300, I think it's poorly programmed from a Systems Administrator point of view.  Maybe it's an "Accounting Software" thing as I greatly dislike Quickbooks desktop / enterprise as well, and a few other accounting software's I've worked with.  
Oh well, it's installed and working now... until I deploy 2022...

Monday, June 6, 2022

Microsoft 365 Tenant Migration with AAD Connect reusing same domain

Recently we had a need to migrate to a new tenant space largely due to COVID19 and extreme downsizing and company structure changes.  I can't stress enough that a successful migration is about planning and staging before any of the migration has actually begun.  Additionally, use AAD Connect to your advantage!  Convert as many cloud only accounts to internally sync'd accounts as possible as this can save you a ton of work.

Note: I'm not going over adding the necessary PowerShell modules Microsoft 365 that are needed.

This is not a comprehensive guide as each environment is going to have it's own unique areas, but this worked great for me and can be used as a template for someone else.

The migration had a few requirements.
  1. We had an internal domain connected with AAD Connect - intdomain.com which was not the primary domain in tenant.
  2. There were 8 domains total in the tenant used for various email accounts. 4 domains were moving, 4 were not.  The intdomain.com was moving
  3. A handful of users had a single user account with email addresses across all 8 domains!
I found that planning for this was very complicated, but execution was actually very simple!  Note that this was for under 50 users and I completed it solo.  I'm sure it could be simplified farther with more scripts or tools.  

Planning / Staging:

First I started with looking at all the different types of accounts and integrations that would be effected. In particular sorting through various service accounts setup for SMTP Auth when these accounts are both cloud only or internal sync.  Additionally, some users are cloud only accounts.

So to start, a handy export was needed from the Tenant - Users and Groups into csv.  You can then change this file to xlsx and start adding more columns and add a filter.  I recommend then adding columns for identifying which accounts are for SMTP Auth, break down which are AADSync (which is included in the export), which accounts need to have Forwards in place to new tenant, which domains are moving, etc.

Now came pre-staging of the OLD environment.  
Since I had accounts that had emails across all 8 domains I began to identify them and break them into 2 accounts.  The one that had domains that would be moving set as Internal AD accounts.  The ones not moving I created new cloud only accounts and setup forwards to their internal account.  This could easily be scripted for large groups.  I used Shared Mailboxes to save on cost.  I used Forwarding instead of adding permissions to the shared mailbox so that after migration I wouldn't have to change them again.
I did the same thing for any Shared Mailboxes, Distribution groups, etc.  Get everything for the domains that are moving converted to AAD Sync internal groups if possible!  With this when you reconnect AAD Connect to the new tenant and do the first sync all of your work will be done for you.

I also moved SharePoint and Onedrive.  For SharePoint our sites were small and not built out, so a simple "Mover" migration was sufficient.  You can find a link to mover in the SharePoint admin console under migration.  I didn't actually migrate Onedrive, instead we handled that from the client computer end (ie disconnect then reconnect to new tenant and let it upload everything again).

Create new Tenant:
You can create your new tenant at any point, you'll just need to add a valid license to it.  Of course the tenant name will be yourname.onmicrosoft.com, make it a good one this time!  Learn from my mistakes, DON'T make it the company name, who'd of figured those could change so often... marketing people... ;)
Create a user account for each user account that will be moving.  This can easily be scripted.  They will all have name.onmicrosoft.com for their username. 
Note: we licensed ours several days prior to migration.

I also added one AAD Premium P1 license and one Azure Information Protection Premium Plan 1 to the new tenant.  This allowed us to do a lot of configuration to the environment prior to migration.
Ie, SharePoint pre-stage and config, Exchange rules and other config, Spam filter, and the gobs of other settings that I wanted locked down.

Week prior to Migration:
We used BitTitan MigrationWiz to move our mailbox information.  So, we did a pre-stage less 30 days 1 week prior to the go day.
I also informed everyone that everything was going to break on the "go" day.  For simplicity sake we had each user leave their computer turned on so that we could manually fix their Teams, Onedrive, Outlook, Office apps, and MS Edge Sync on day of migration.  This was doable for us do to our small user count.  I'm sure there are better ways...  More on what I did to fix each app at bottom.

I also pulled all of the LegacyExchangeDN just in case I needed them.  Easier now then later...
Get-Mailbox | Select Name, PrimarySMTPAddress, LegacyExchangeDN | Export-Csv 'pathtofile\LegacyExchangeDN.csv' -NoTypeInformation
Get-DistributionGroup | Select Name, PrimarySMTPAddress, LegacyExchangeDN | Export-Csv 'pathtofile\LegacyExchangeDNgroups.csv' -NoTypeInformation
Create a user migration List:
Also, I created a csv file of all my users I had pre-staged in the new tenant.  On day of migration their UPN will need changed prior to reconnecting AADConnect and I wanted it done easy.
CSV file needs to have at least 2 columns with the following headers.  Name this userCloud.csv
PrimarySMTPAddress and UPN
PrimarySMTPAddress is the username in the new tenant, ie jdoe@name.onmicrosoft.com
UPN is proper primary email address you will want them to have. ie jdoe@mydomain.com


Day prior to Migration:
On the day prior I ran another Pre-Stage with MigrationWiz to get everything up to that day.  I don't want to be sitting around for hours waiting for the final staging.

Day of Migration:
  1. Changed MX Records to an invalid record for each domain.  This made any mail sent to us get "held" by the sending server for retry instead of giving back an NDR.  I want all that mail to come through once I've moved the domains.
  2. Run the final MigrationWiz, I also removed everyone's access from SharePoint.  Wait for final pass to finish before proceeding!
  3. Add an empty root OU to AD, this is temporary.
  4. Run AADConnect configuration, and point it to that empty root OU you just created.  When the sync runs there with be NOTHING to sync and so it will process this as removal of ALL of your AADSync objects.  Just like that it removed everything for you so you can remove your domains.
  5. Remove any objects that were cloud only objects for the moving domains.  
  6. Under Settings - Domains - click on each domain and go through the tabs, you'll see what objects are left on each domain.  Once the domains that are moving are cleared of all objects you can delete each of the domains!
  7. Now you can go to your new Tenant and add each domain. Hint: use a different web browser for each tenant so you're not having to constantly login and out. For PowerShell use 2 different VM's.
  8. Now we're going to fix the UPN for all of the new Tenant pre staged users.  You're going to use the CSV you created with Powershell
    1. $users = Import-Csv 'path to file\userCloud.csv'
      foreach ($user in $users){Set-MsolUserPrincipalName -UserPrincipalName $user.PrimarySmtpAddress -NewUserPrincipalName $user.upn }
  9. Now all of the users in the new tentant have the proper accounts that MATCH their internal Active Directory UPN's.  This way AADSync will automatically associate them properly.
  10. Go back to AADSync and configure it to point to your proper OU's again.  Let the sync run and bingo, you now see that it associated properly AND all your groups are back and created / populated with group membership.
  11. Fix your MX Records and test!  Don't forget to setup SPF, DKIM, DMARC again as needed.
  12. Note that you need to create "cloud only" distribution groups and add membership back.  If you converted them to Active Directory prior then they where automatically created by the sync
  13. Test your emails setup out again!  Send and Receive
  14. Now it's time to fix apps

Fix Apps: 

I found this part to be the worst.  Overall it went fine, but it's tedious.
Note this is for Windows 10 only.  Other OS's may be different.
Some machines signing out in one place caused others to auto sign out.  Some didn't, IDK.
  1. I started with ensuring everything was closed.
  2. Opened Control Panel, switch to small icons, open Mail, Show Profiles, Delete
  3. Opened Excel (or Word), File, Account, Sign Out
  4. Open Settings, Accounts, Accesss work or School, expand the account, Disconnect.
  5. Also checked under Accounts, Email & Accounts, and removed anything I could. 
  6. Opened Edge browser, Settings, Sign Out of profile, Did not clear their favorites and other info.
  7. Dumped linkes to SharePoint as I saw this (and added the new site)
  8. Opened OneDrive and Unlink this PC (note it prompts that it will stop synching and a copy of the files will be left on the PC).
  9. Open Teams and Sign out
  10. Reboot
  11. Open up each and setup new.  Edge, OneDrive, SharePoint, Office, Teams.  Note that GPO's or Azure AD can help do this automatically for you with SSO and device mgmt if you have it.
Finally, notified users to sign out of Teams, SharePoint, Onedrive, etc on their mobile phones.  In Outlook mobile app delete the account (for Onedrive connector too) and add back new.


Clean Up!

At this point you should be back up and running.  Time to just start combing through settings and objects and doing any cleanup that is necessary.  Hopefully if you did this it went as well as mine did.  

Don't forget your scanners and other components that use SMTP Relay or alerting of that sort!
I'll also throw SharePoint in here, I had used Mover to move everything after the fact and then manually added back permissions.  We weren't using a lot of SharePoint at the time so it wasn't a big deal.  Of course, if you're using powerapps, powerautomiate, lots of SharePoint, and other then you'll want to spend more time than I did looking at these solutions.  (we do now, and what a nightmare that would be all on its own!)

Hopefully this helps someone.


Wednesday, January 12, 2022

Godaddy - new certificate crt and pem files, but need pfx

My brain mostly "seems" to be able to contain valuable information.  But for some reason this piece of valuable (at least 1 - 4 times a year) is never retained.  Each year I find myself pulling out the google foo to find a solution.

The issue:
I'm either purchasing a new cert, changing an existing cert, renewing a cert, etc.  I go to Godaddy, run through the process and get the download files.  I'm given a CRT, PEM, and intermediate.p7b files.
I need a PFX file.

Google foo always gives me plenty of articles about using openSSL typically.  They typically involve running a command which looks promising, but I KNOW I didn't use openSSL last time...
I think my downfall with this is that I usually type in something like "Godaddy convert CRT to PFX".  The missing part is that I actually have a PEM which is what's important to me here.

Solution:
Since I typically generate the CSR from within one of my IIS instances all I have to do to get the PFX is go back to IIS.  Complete the signing request, and when asked for the new file give it the PEM.
Now, right click and export to PFX, give it a password and finish my project.


Now next year (or month) when I can't remember this easy process for the 100th time hopefully my google foo will see my own post OR I'll finally commit this to memory.

/wr mem